Dolls #7 & #8: The Softies
3.14.2014. My dollmaking has been about exploring where my hands will lead me. I like the term BRICOLAGE, French for "tinkering," referring to the art of making stuff from what happens to be lying around. What I have lying around is an accumulation of flowery cottons I keep picking up at the used craft supply store.
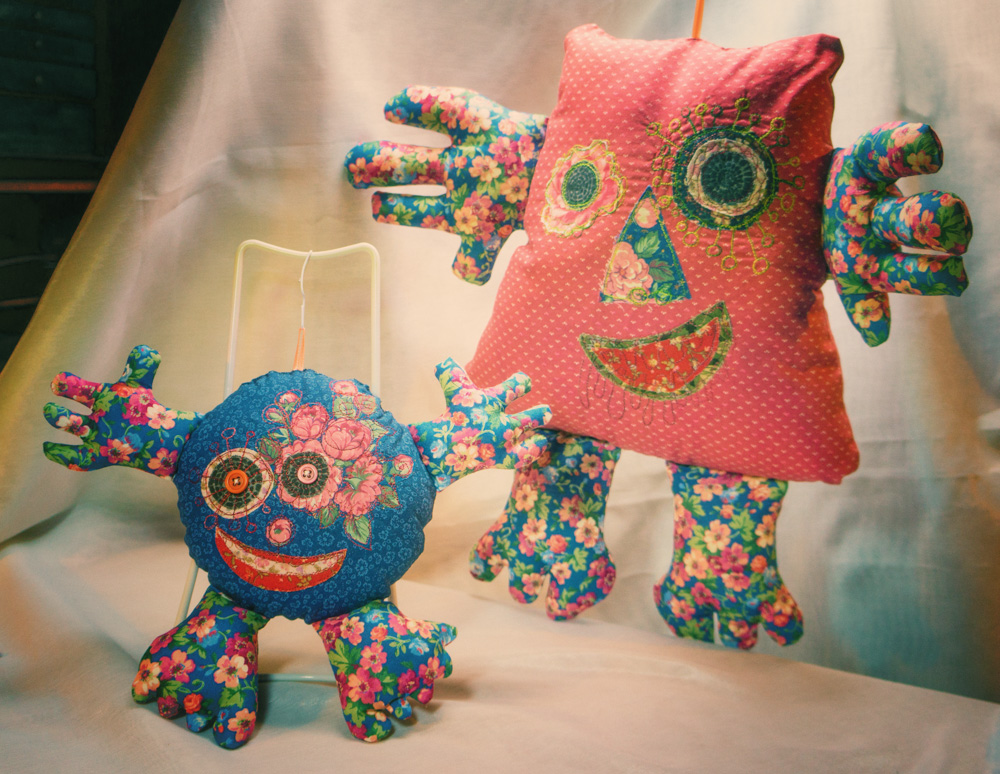
I'm just reaching the level of confidence where I might be able to give some of my creations away. When I bought a magazine called Stuffed: The Crafting of Softies, I figured now was the time to make a gift for the youngest member of our family, the toddler Maya.
I wound up with two dolls because (consequence of winging it) the first set of limbs were too small. Rather than throw them away, I made a second, smaller version for the second youngest family member, 8-yo Gabrielle.
Here's my process:
 :: Make paper patterns as desired to keep hands/feet consistent, left and right.
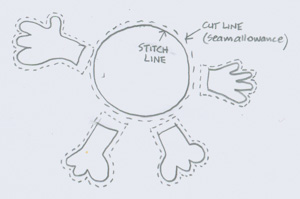
:: Draw the stitching line on the fabric back for each body part. Double the fabric and cut two of each piece, at least a quarter inch larger than the stitch line (to provide seam allowance). (See Sketch 1)
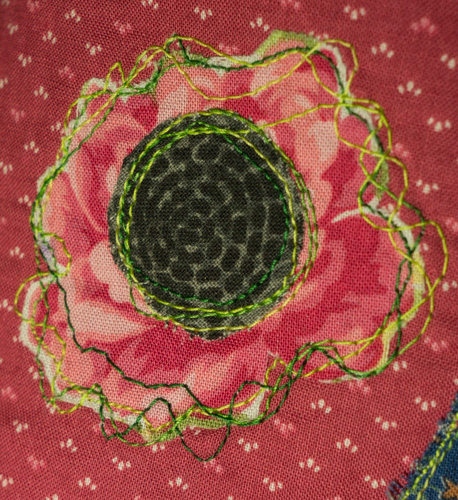
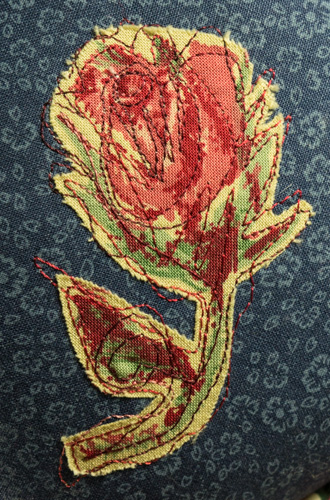
:: Decide on appliqués -- shapes cut randomly from fabric or "fussy cut" specific prints (like a rose or circle design -- see rose below).
 :: Bond the target appliqué fabric to Heat 'n Bond Lite (a paper-backed iron-on adhesive, suitable for sewing through) with a medium-hot dry iron for 2 seconds. A teflon press cloth comes in handy to protect your iron from errant glue. I learned the hard way to cut the adhesive smaller than the cloth for this first pass.
:: Trim your appliqués to their final shape with a small scissors. Peal off the paper backing. Position them and press them again for 6 seconds to melt the glue and make a permanent bond.
:: I glue-basted some Pellon interfacing to the backs of the bodies to stabilize the light material for machine embroidery (505 spray on one, Elmer's school glue [ironed to set] on the other). Any stabilizer will do -- even paper, which can then be torn away.
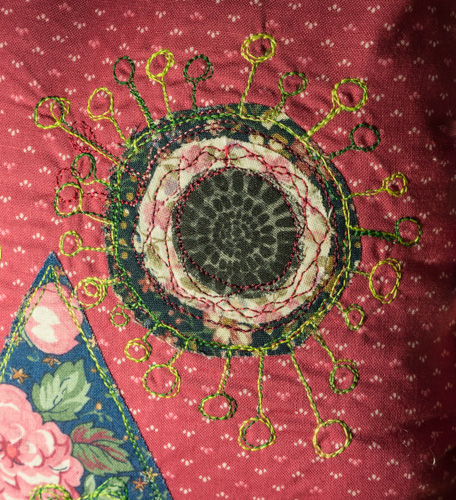
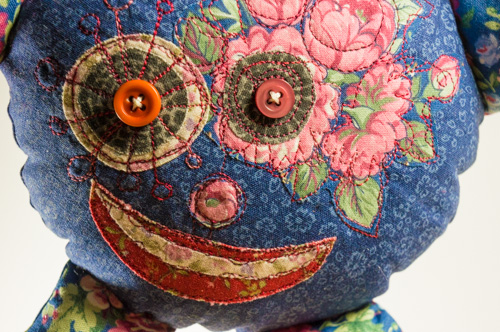
:: Embroidery: I used the darning foot and set the stitch length to 0 to allow free-motion doodling with thread. Once you get the hang of it, it's the most fun part. I didn't worry about covering each edge, which will allow for a nice fuzziness as the dolls age. I added button eyes to the second softie, since it will be going to an older child. On the back, trim away any excess interfacing.
:: Appendages: With right sides together, sew the appendages along the stitch line, leaving the ends open. Trim seam allowances to 1/8" and clip curves. Leave an inch of fabric at the open end. Turn inside out and press with a little spray starch. Stuff with Poly-fil, leaving that bottom inch empty.
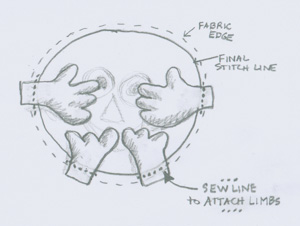 :: Attach appendages. Since this is a baby toy, I wanted to make sure the arms and legs were bound into the seams. This totally taxed my spatial intelligence but I finally figured it out. With body front lying face up, position the appendages around the perimeter. Then flip them toward the center, so you can line up the stitching lines. Pin in place. Sew down the appendages on the outside of the final seam. A zipper foot is useful, to avoid having to smoosh the stuffed parts. (See Sketch 2.)
:: Attach front and back. Lay the body back over the front and pin them together. All the limbs will be bunched on the inside so it will be a lumpy mess. But careful pinning can be done, making sure the edges are lined up. Sew around the perimeter, using a zipper foot, leaving a wide opening on top. (See Sketch 3.) Clip the curves to the stitching. (I forgot to do this with the mini 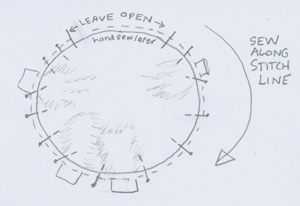 version, which is why she's kind of lumpy looking around the edges.)
:: Turn inside out through the opening. Pop! The doll gives birth to itself through its head! Make sure it's all turned, running a chopstick around the inside seams. Give it a little steam press to make the edges smooth as possible. Press the edges of the opening in, on the stitching line to help you hand-stitch later on.
:: Stuff the body with lots of Poly-fil. Hand-sew the top closed. I included a little ribbon in the top seam, so the dolls can be hung up.
These aren't really hard. You just need to be patient and have fun.