Shibori with Traditional Japanese Stitching (Part 1)
9.4.2014. The standard way to teach folks the joy of creating their personal statement on fabric is through good old 1960s-style tie-dye. Scrunching or folding fabrics and holding them in place with clamps or rubber bands prevents the dye from seeping into the bound portions and creates a design. "Resists" -- whether by wax (as in batik), by flour paste, or by folding/twisting/scrunching -- are at the heart of traditional fabric beautification.
During our indigo adventures, Jim and I had a good time trying various manipulations. The results were always interesting in a random kind of way. Last time, I tried some of those handy "just-do-this!" instructions but found that the coolest designs only came out on, say, the topmost sections of my folded cloth and weren't carried through to the insides. What was I missing?
This is the curse of being self-taught. No one is by your side to say, "loosen up the tension" or "wind your fabric tighter." So I have to hit the books. The original "tie-dye" was perfected by the Japanese in their practice of shibori. So I got this book: Shibori: The Inventive Art of Japanese Shaped Resist Dyeing.
The Japanese culture is a patient culture, striving for perfection, everything just so. Their shibori patterns were made with needle and thread. I can do that? How many "Cheers" re-runs could it take?
So... starting simple, with "wood grain" pattern (mokume shibori). Doubled up #20 crochet thread, a five-inch doll needle, and about 1/4 yard of white Kona cotton. Rows of running stitches. See photo below.

Then the running stitches are gathered tight, the ends knotted (photo at top).
In today's tie-dye, these thread-resisted rings (ne-maki shibori) would be made with rubber bands. But I wanted to experience making them the old fashioned way. Hardest was following the diagram for the kamosage knot. The stated advantage is that it allows the thread to be simply pulled off after dyeing, without having to resort to a scissors. It tested my mental and manual dexterity to the max.
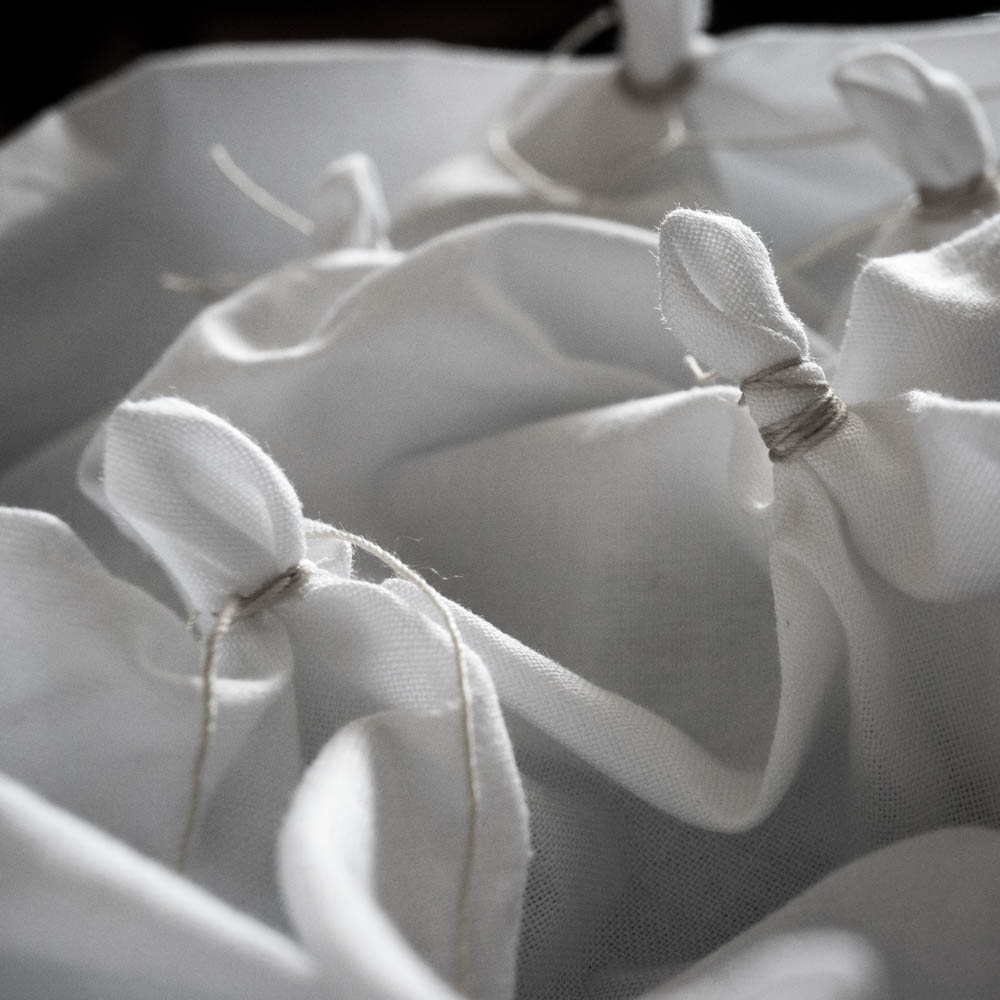
The photo below is the result of four evenings' work: (1) rings, on the left; (2) my gathered running stitches, right bottom; (3) ori-nui shibori (right top) requires that the gathered running stitches be made through two layers of pinched-together fabric; and (4) the strangely complicated nui yoro shibori -- narrow pleats, stitched together and pressed with starch, then wrapped around a thick cord and tied -- it's supposed to yield stripes.

Next up, the dye process. I decided to experiment again with Procion MX dyes, rather than my usual indigo. Continued tomorrow >>>
***