Mad in Pursuit Notebook
 A Dollmaking Saga: Simone
An illustrated walk through the creative process
13 December 2023. Cool weather brings long quiet days and afternnoon twilight loosens the imagination. Mid-November put me in the mood for dollmaking, that most magical of crafts.
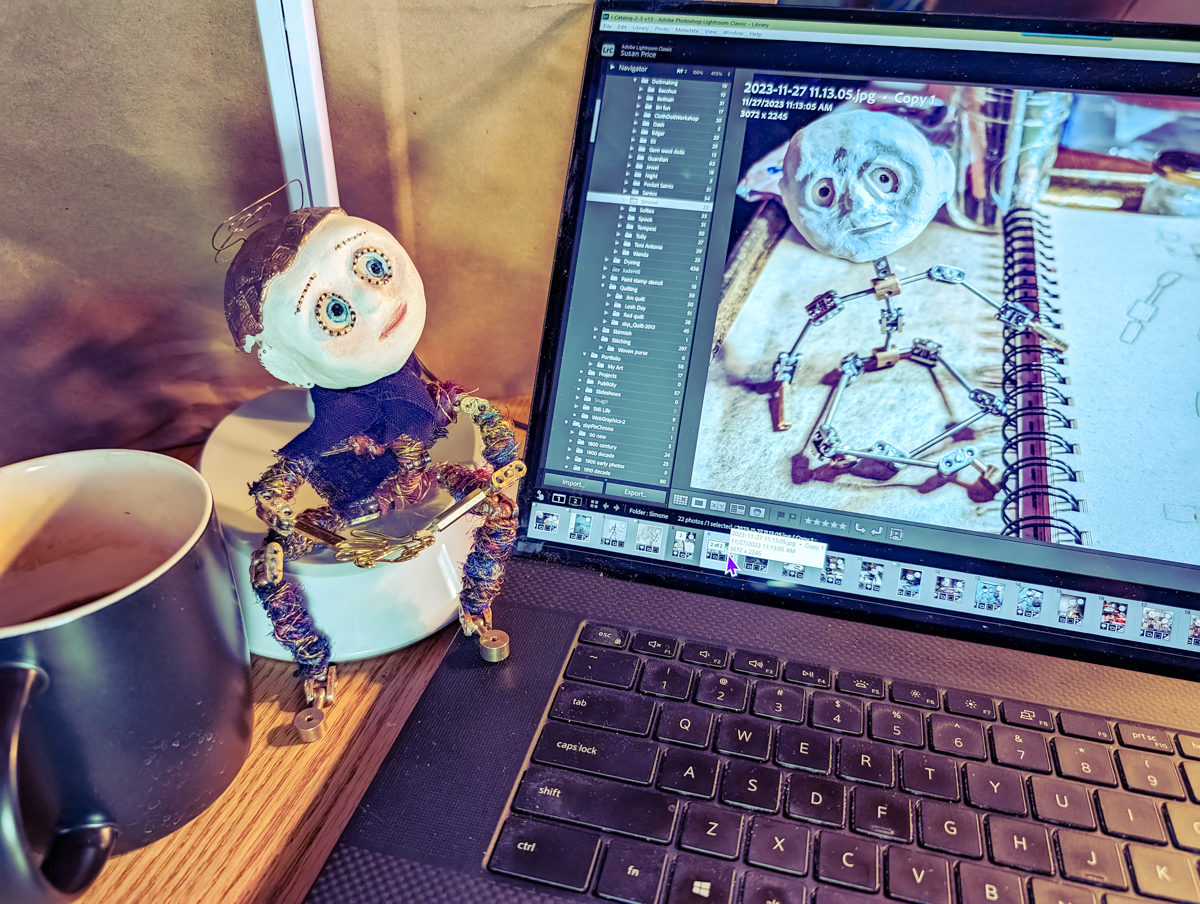
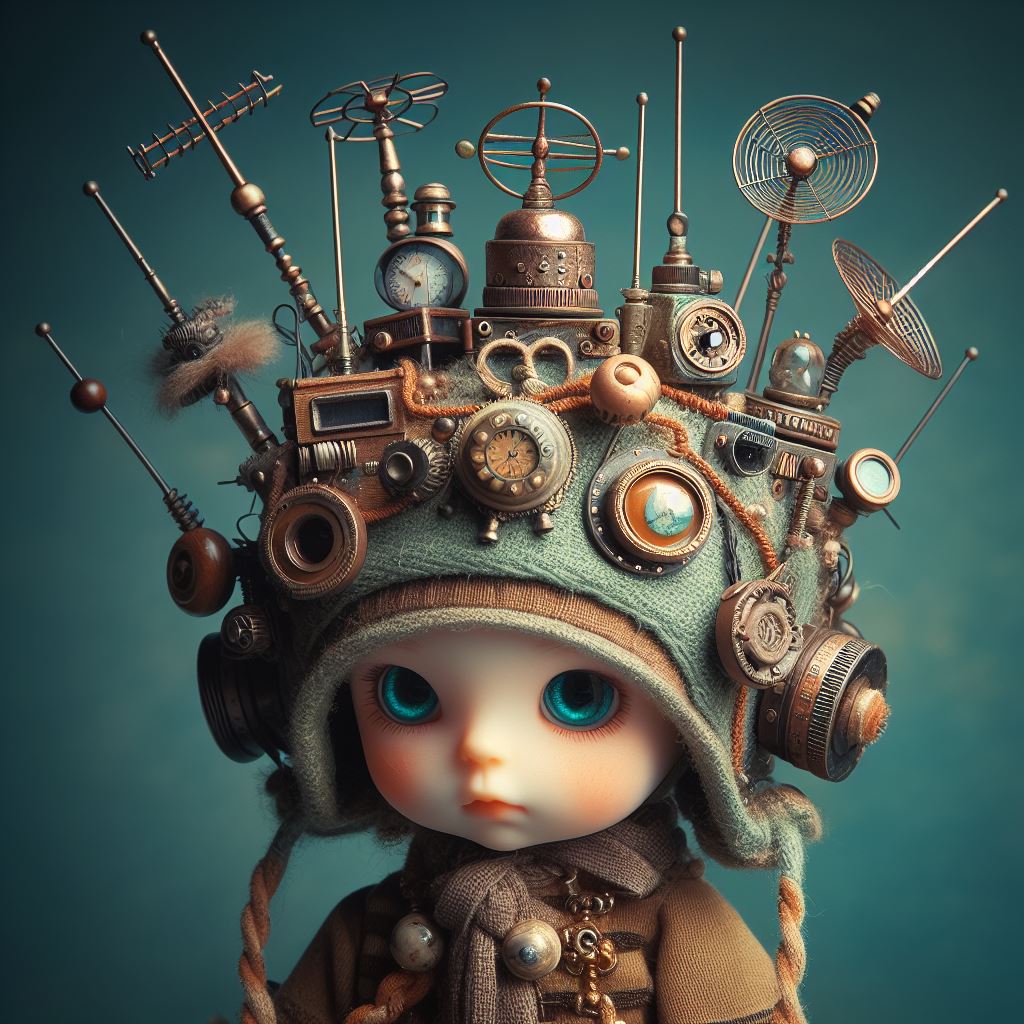
 This season, I began my process using artificial intelligence (AI) images—my new brainstorming tool. (See the sample image here, then check out the gallery.)
I had in mind a doll that was both mechanical and humanlike, somewhere on the continuum between futuristic cyborg and Victorian steampunk, in a space where dollmaking meets AI. I wanted an expressive companion figure capable of tuning in to signals of a world beyond me. She might even be capable of channeling sparks of insight from ancestors during family history sessions.
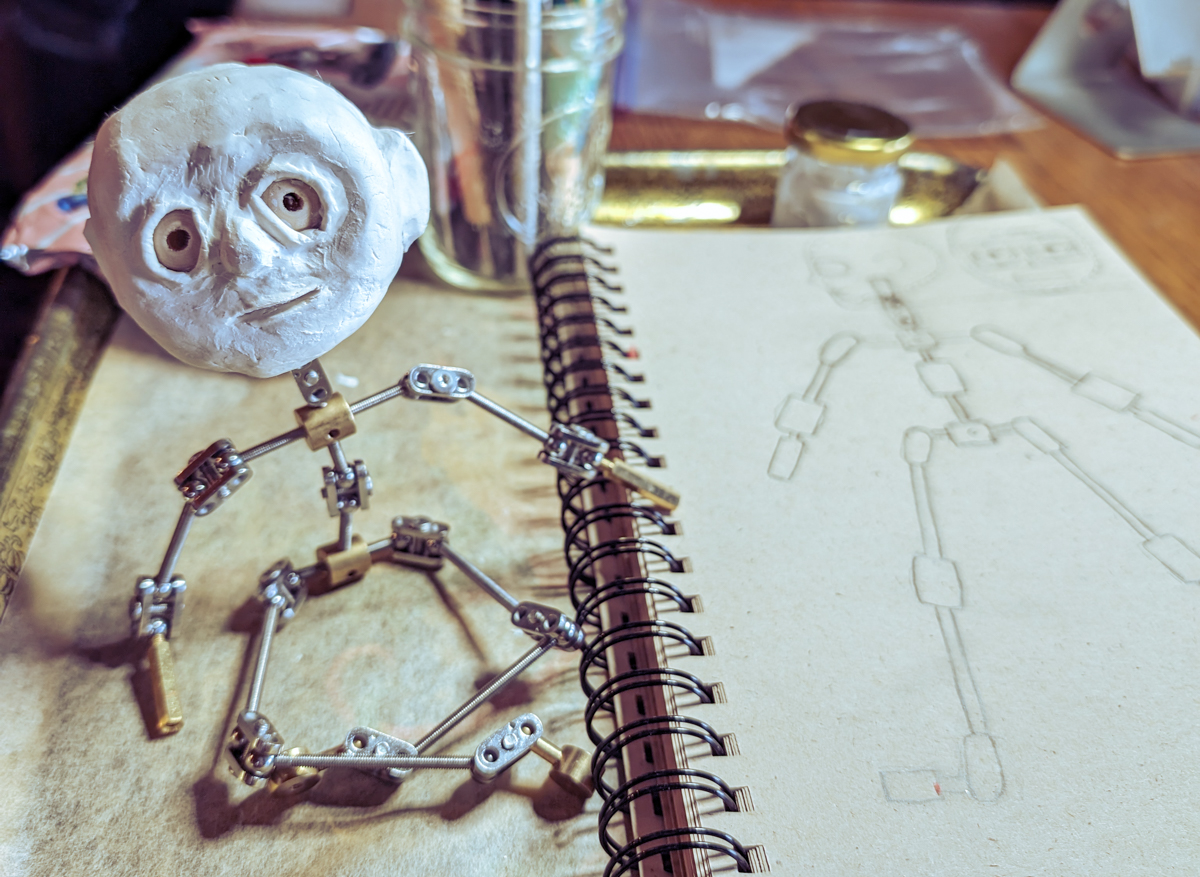
The skeleton
I wanted a doll who could pose. This usually means making a wire armature (aka skeleton). A doll who moves like a puppet needs joints. If I wanted the mechanics of this doll partly exposed...how would I do that?
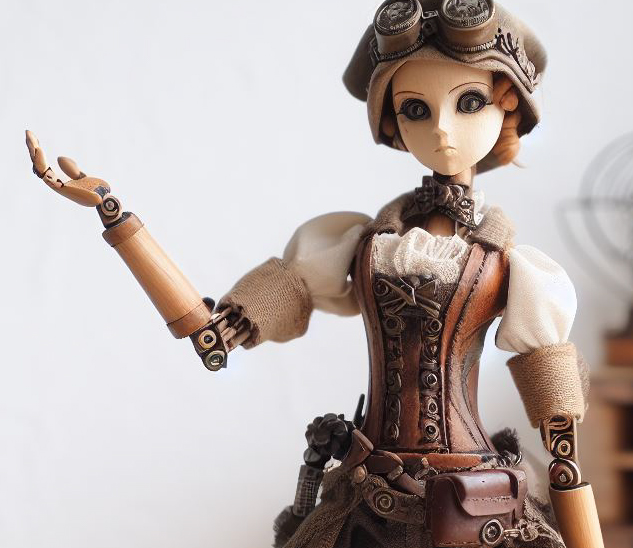 I consulted my AI steampunk dolls and admired their decorative mechanical joints—like a hinge.
Googling "doll hinge" led me to the world of stop-motion animation. I discovered a jointed metal armature for posable puppets.
Only problem: they are expensive yet only come in DIY kits. I braced myself for a learning curve.
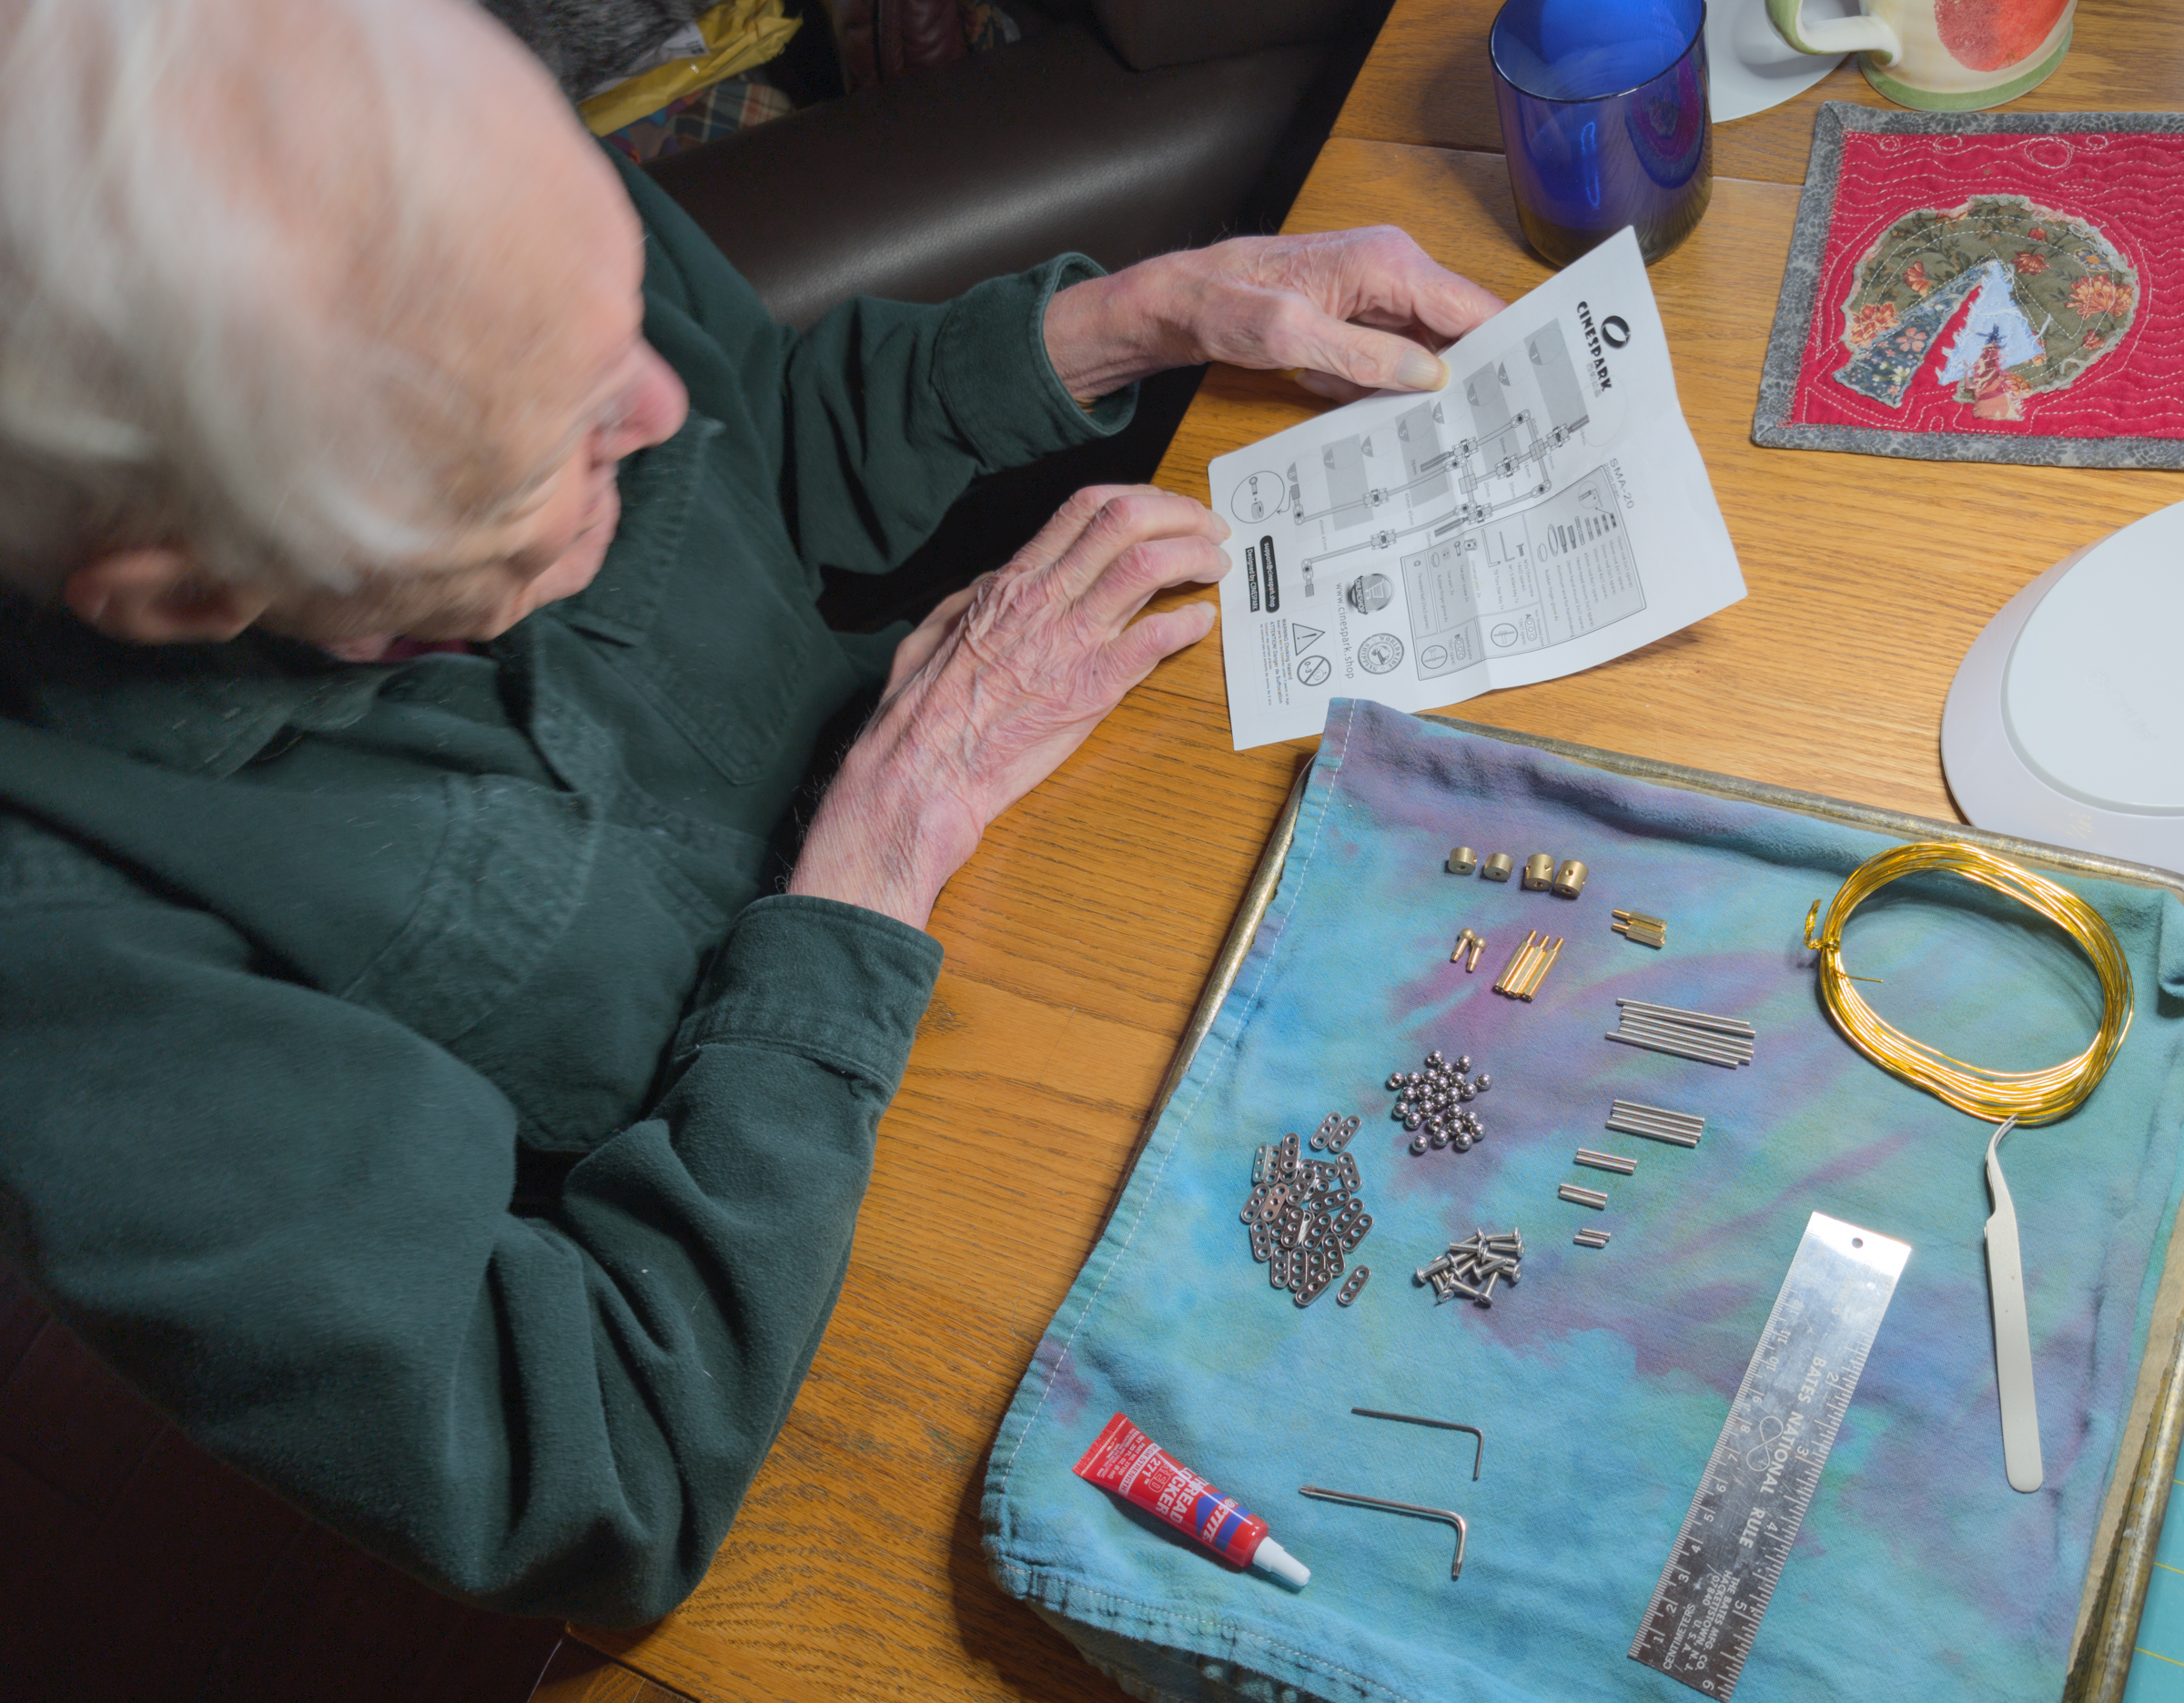
Thanksgiving, Nov. 23. As you can see from the photo below, Z helped organize the myriad pieces of the Cinespark SMA-20 armature, as we struggled to make sense of the cryptic instructions. I started from scratch learning about miniature universal joints and ball joints. Their assembly had to be reinforced with Loctite threadlocker superglue. Z was confused, but it helped me to talk the process out loud to him as I puzzled through.
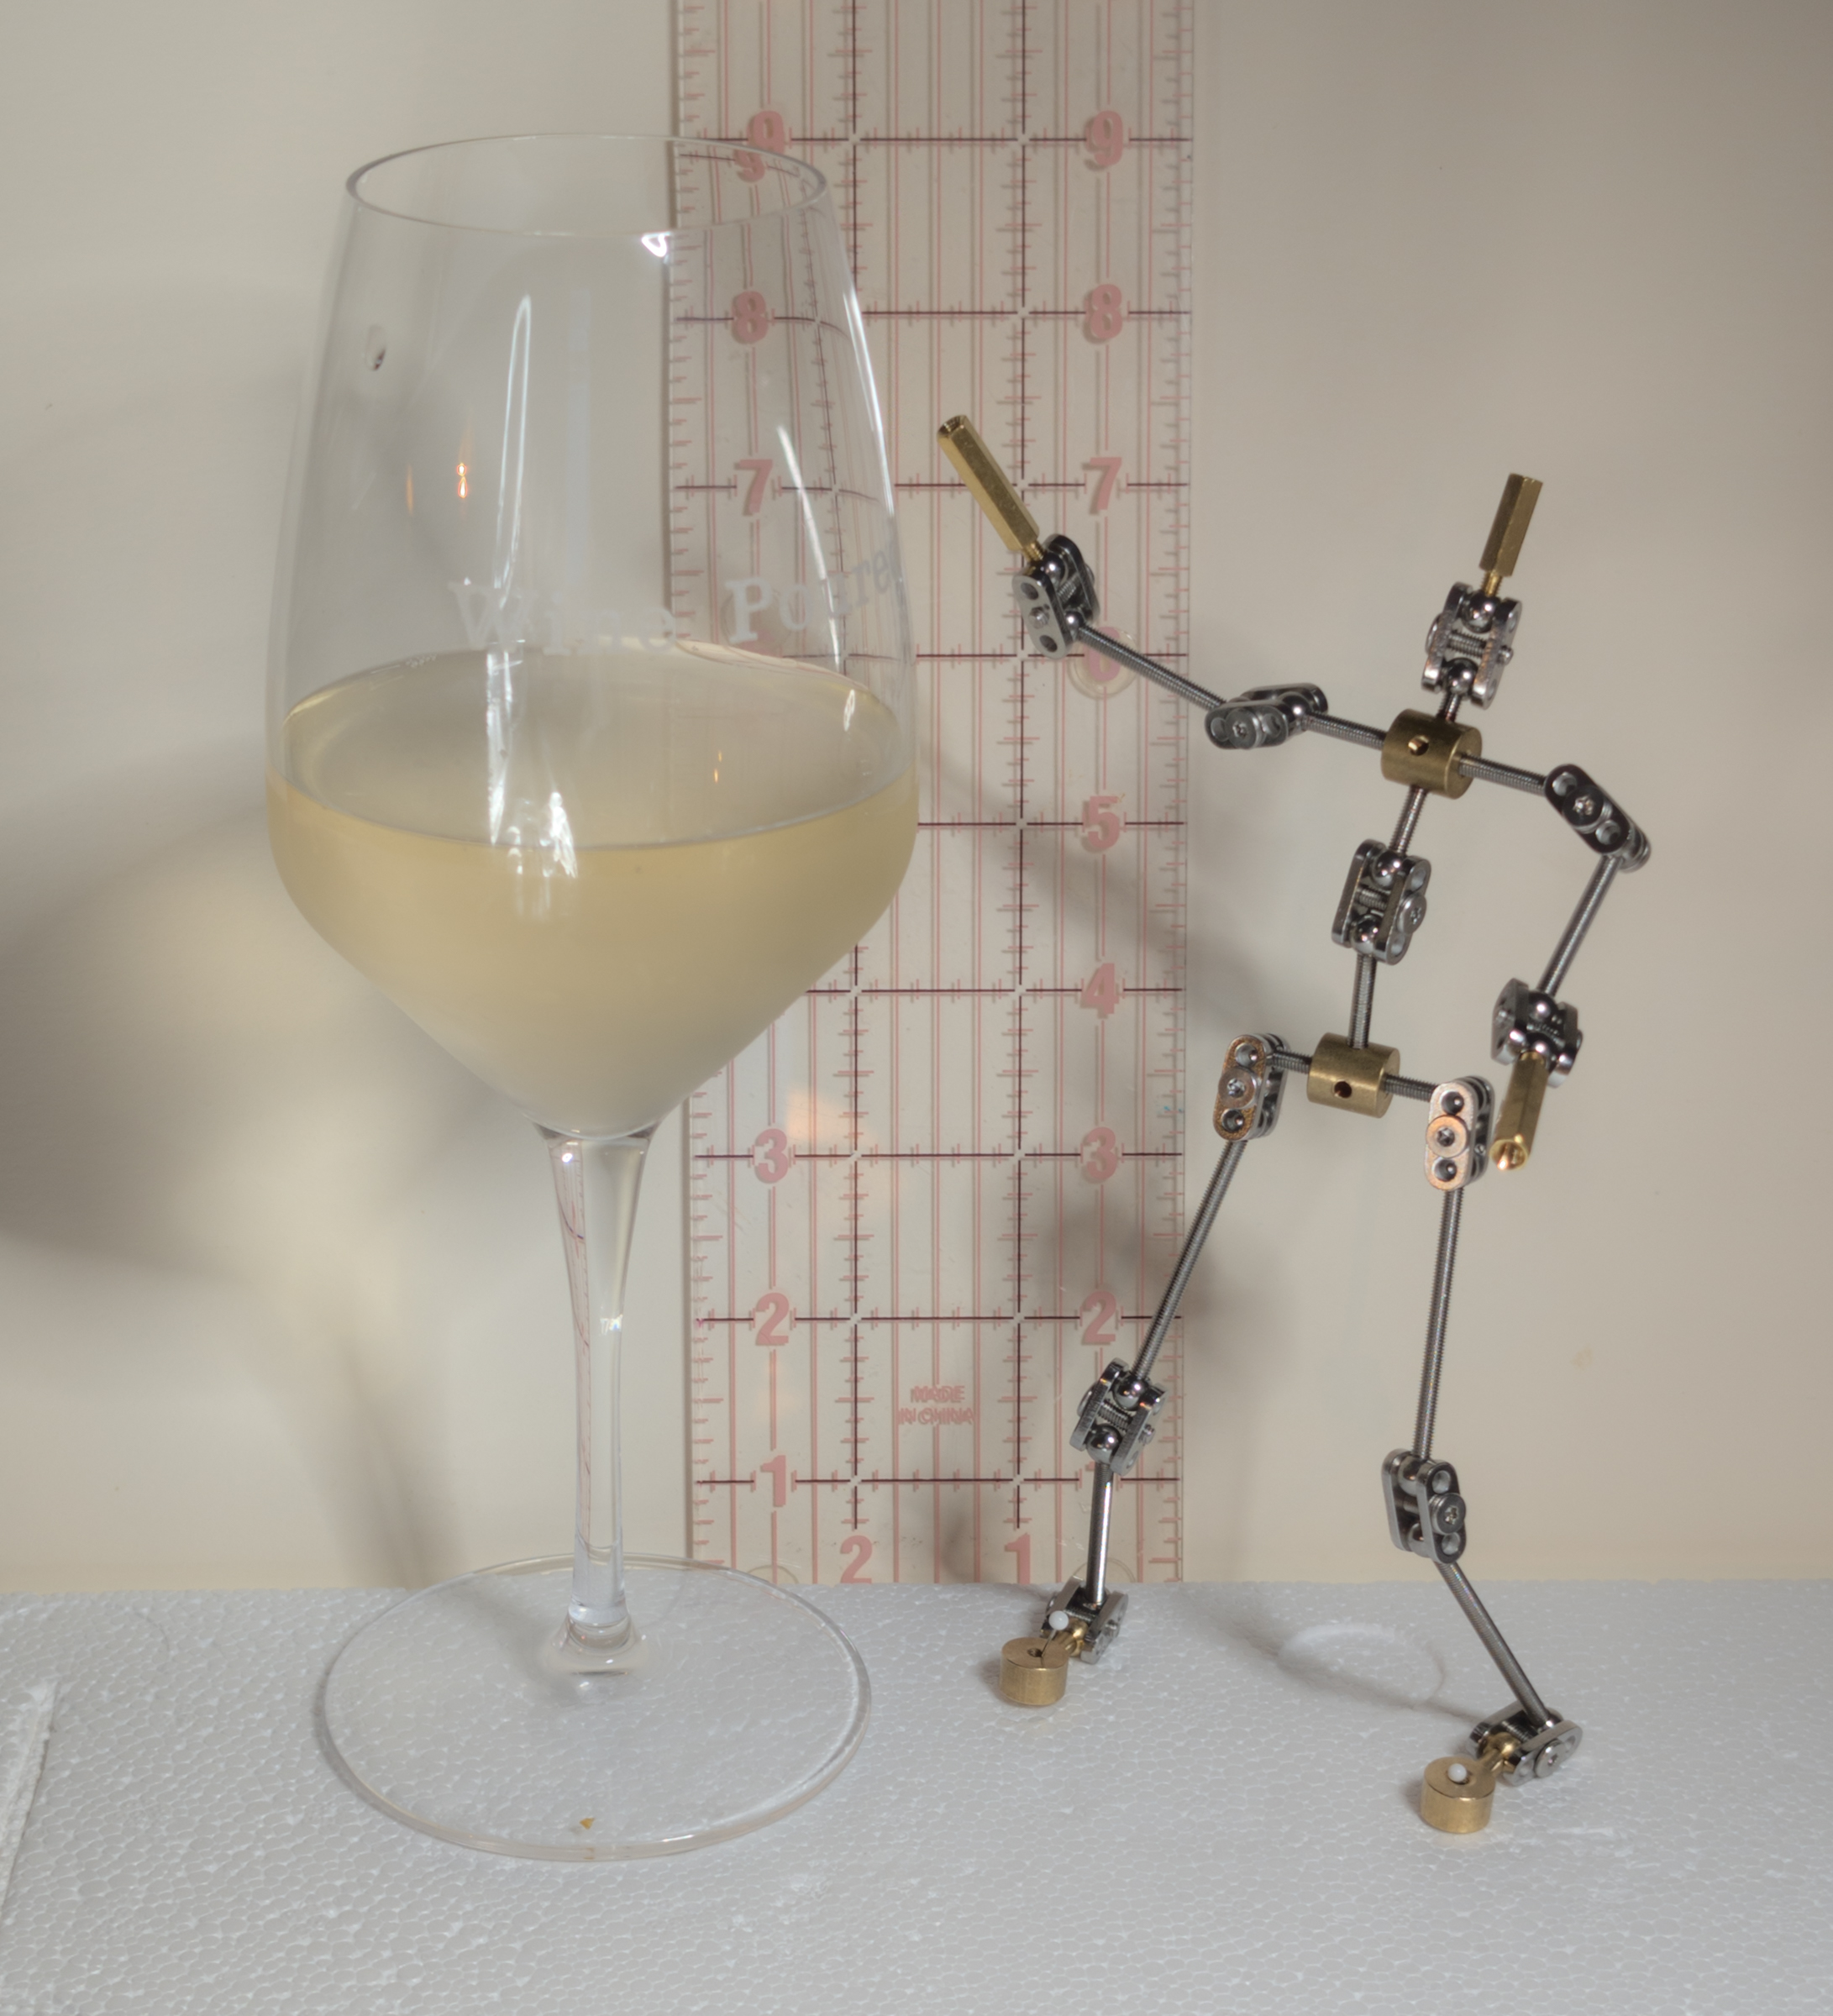
Success! Once the threaded rod and ball "bones" were constructed and laid out next to the diagram, assembling the ball joints with tension screws and a tiny allen wrench went quickly.
Now what?
The head
Thanksgiving weekend. There was no "kit" for the head. I was on my own.
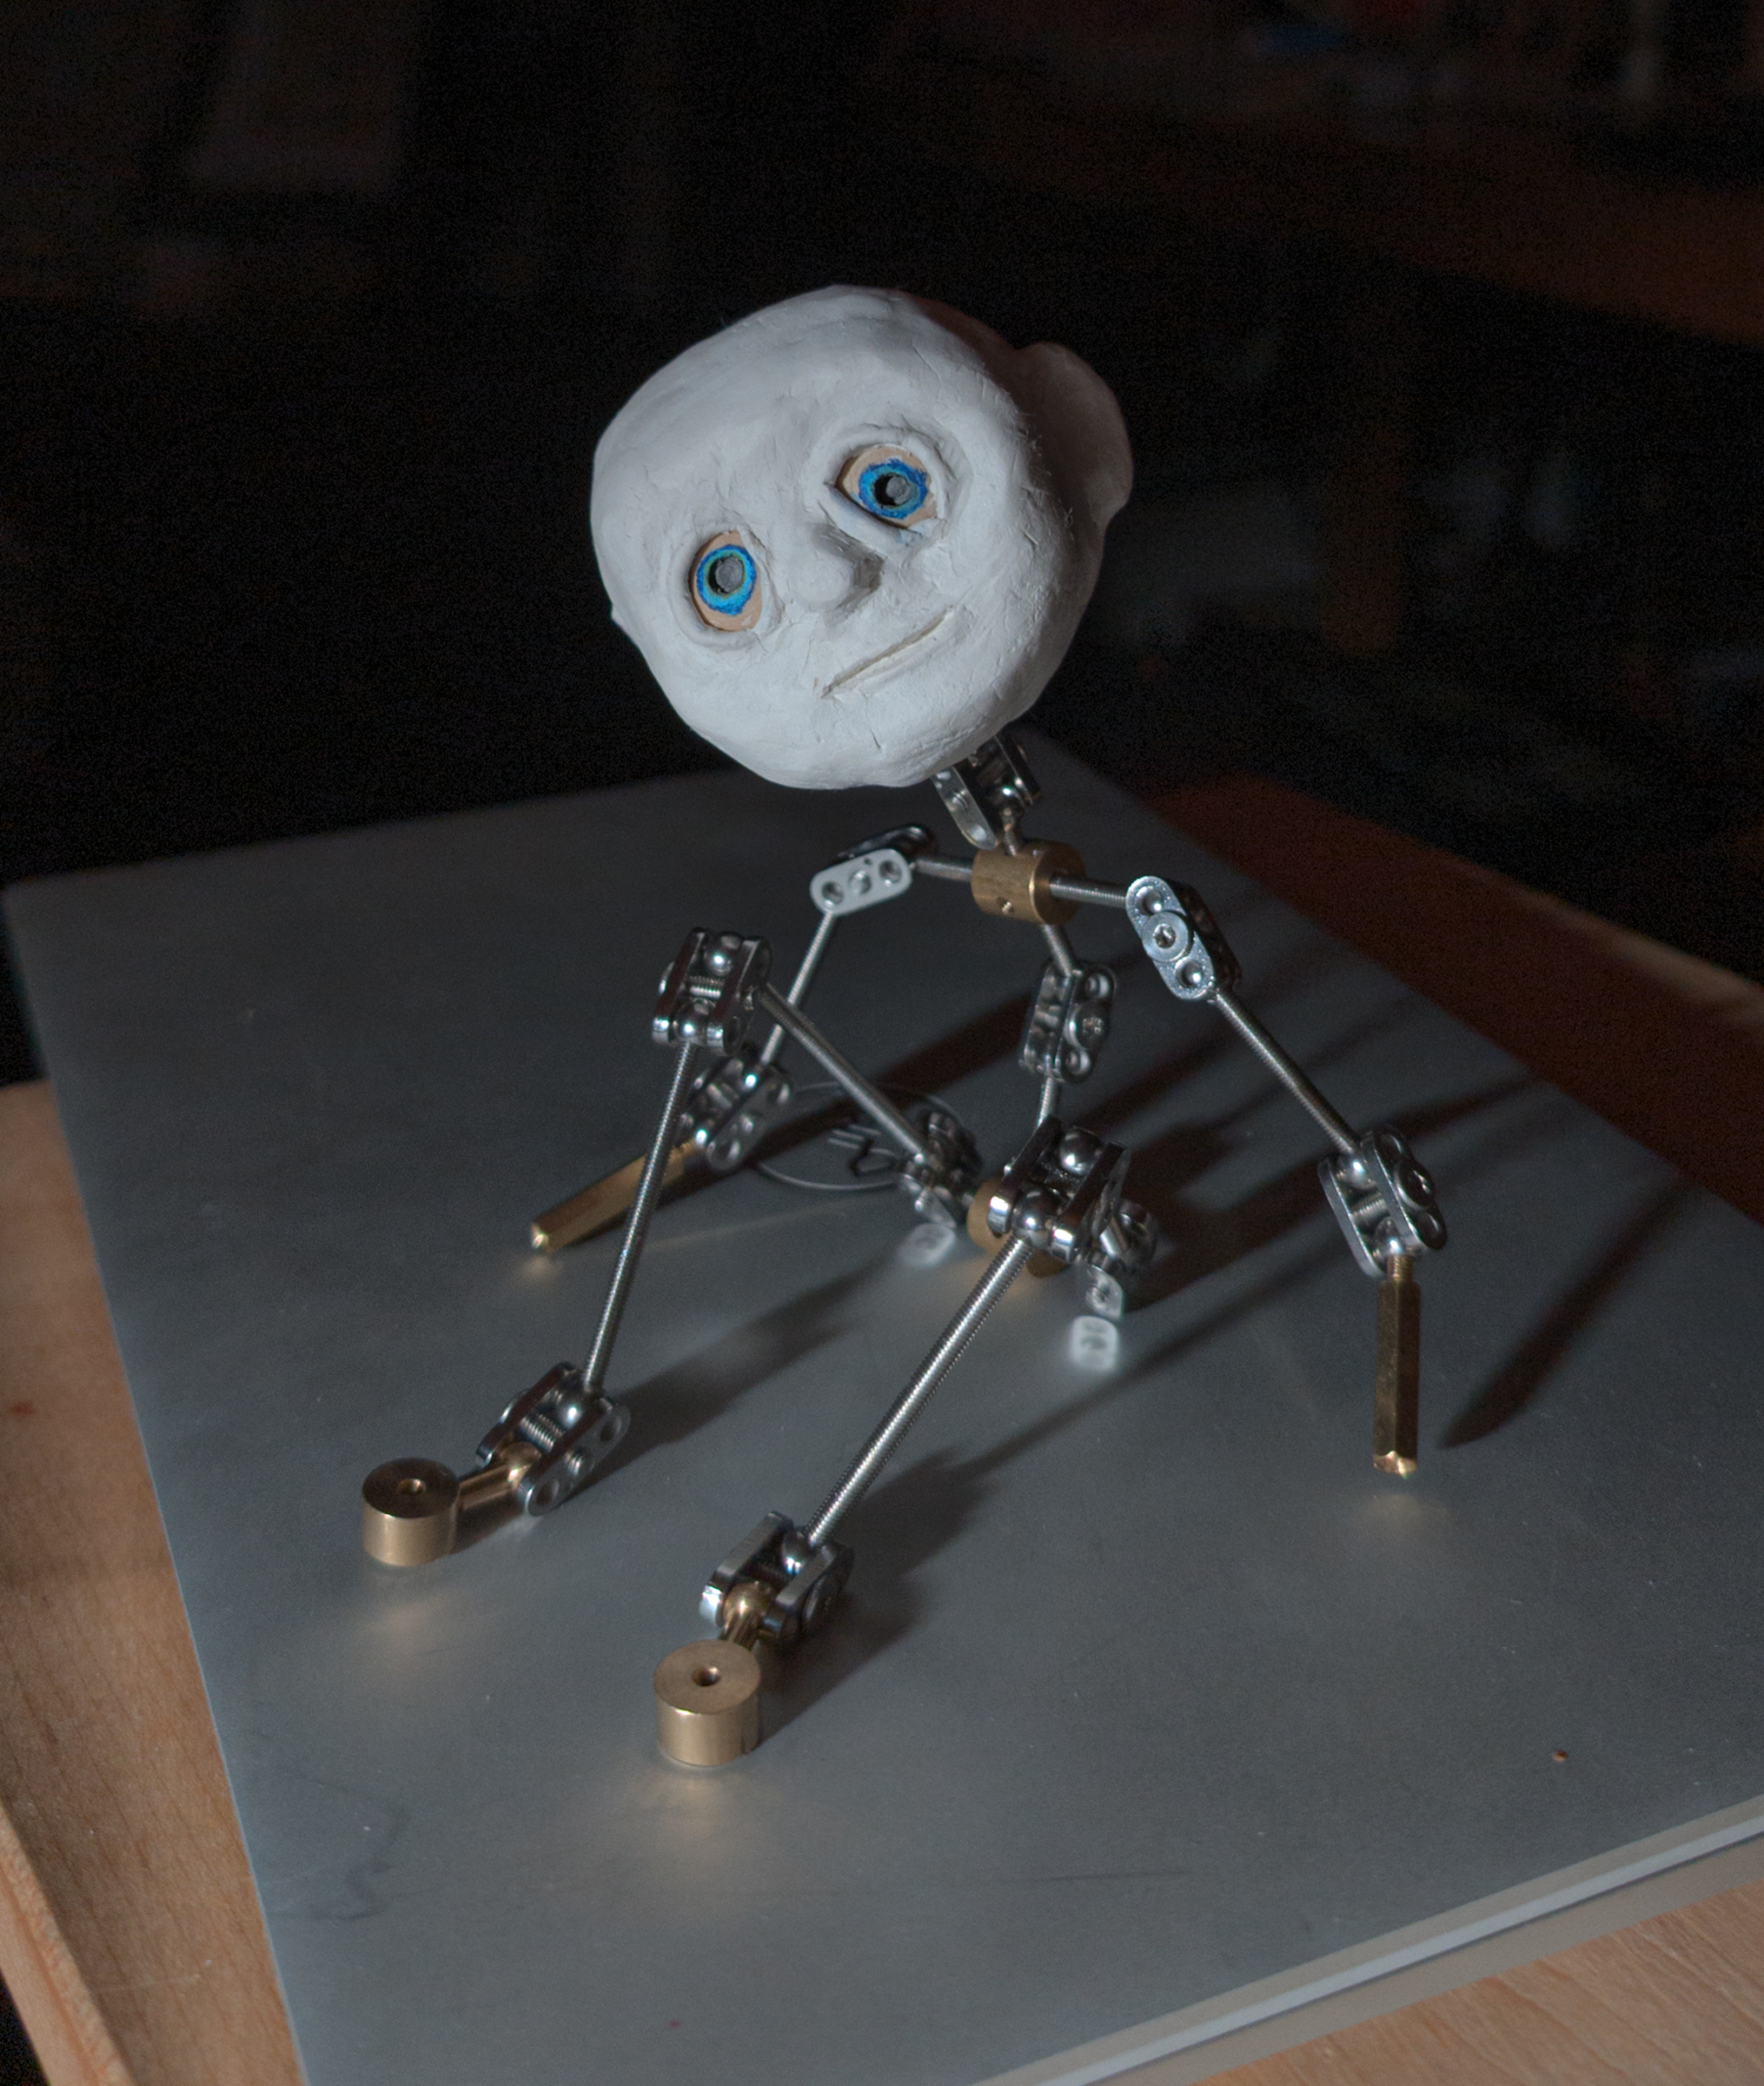
Luckily, I found this video: "How To Make A Stop Motion Puppet Head From Simple Materials" by Miguel Castro (Animation Planet channel). With his guidance, I chopped off the end of a foam pool noodle, carved a roundish head, and dug out an oblong eye box. I was fascinated that he used wooden beads for the eyes, with the hole as the "pupil." By lining the eye box with aluminum foil, I could then use a pointed tool to shift the direction of my doll's beady gaze. Cool.
This head base was then covered with a thin layer of La Doll air-dry stone clay. It turned out way bigger than I planned because the only wooden beads I had on hand were big 16 mm. ones from another project. Oh well... I was learning.
It took a couple of days for the head to dry. Air-dry clay is easier to work with than polymer clay, but you don't have the near-instant gratification of getting back to work after a quick oven-cure.
Faces are hard. I don't have a delicate hand. My creations easily slip into the grotesque.
November 27-29. Once the creature's head was dry, I did my best to smooth her skin with a light sanding (Dremel silicone polishing heads) and applications of "slip" (clay diluted with water).
I painted her eyes with water color pencils and partly filled the pupil hole with a daub of clay and a dash of black acrylic paint. Later in the process I dabbed some Diamond Glaze on them for shine. Lesson learned: I should have painted and glazed the eyes before I assembled the head.
Faceup
I've learned from other doll experiments to go slow with the "faceup" (coloring the doll's face). Too much, too fast spells disaster.
Experiment: I uploaded the photo above to ChatGPT and consulted about makeup. My prompt:
You are a makeup artist for a movie about a small alien creature whose embedded radio can tune into all the stations of the universe. She has big blue eyes and pale complexion. Her photo as she looks so far is attached. Please render her face with appropriate makeup.
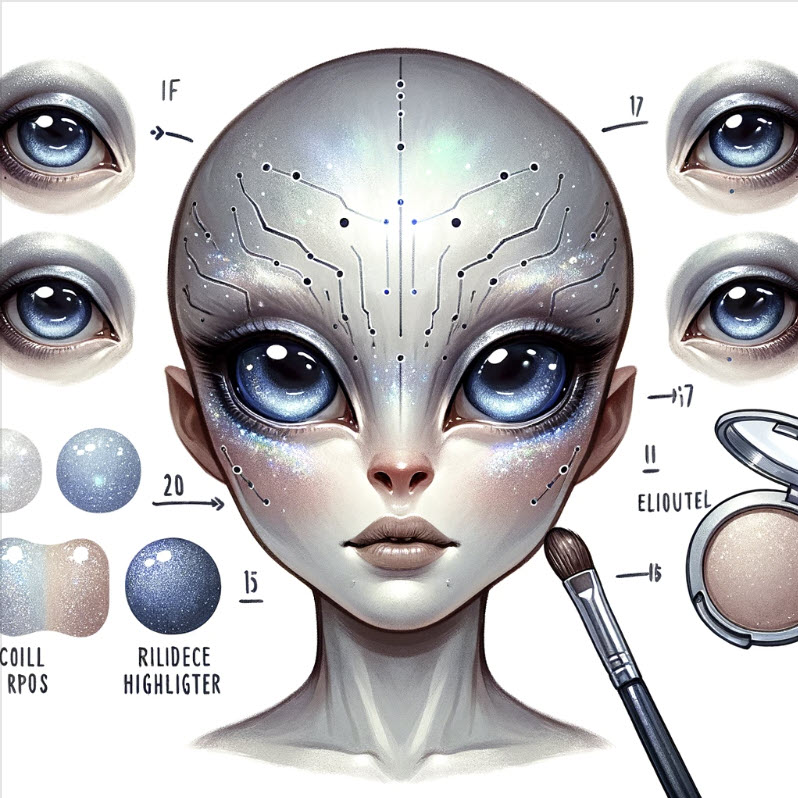 The seven paragraphs of text advice were helpful. The rendered image (shown here) was straight from Hollywood, but interesting to consider.
Afraid of getting clownish, I applied my creature's make-up (Pearl Ex powders, eye shadow, and dots of acrylic paint for eyelids and brow) in layers, with a misting of Mr. Super Clear (matte) in between.
Note: I should have applied gesso to the clay head before the color. However, Mr. Super Clear does provide some "tooth" for color to cling to.
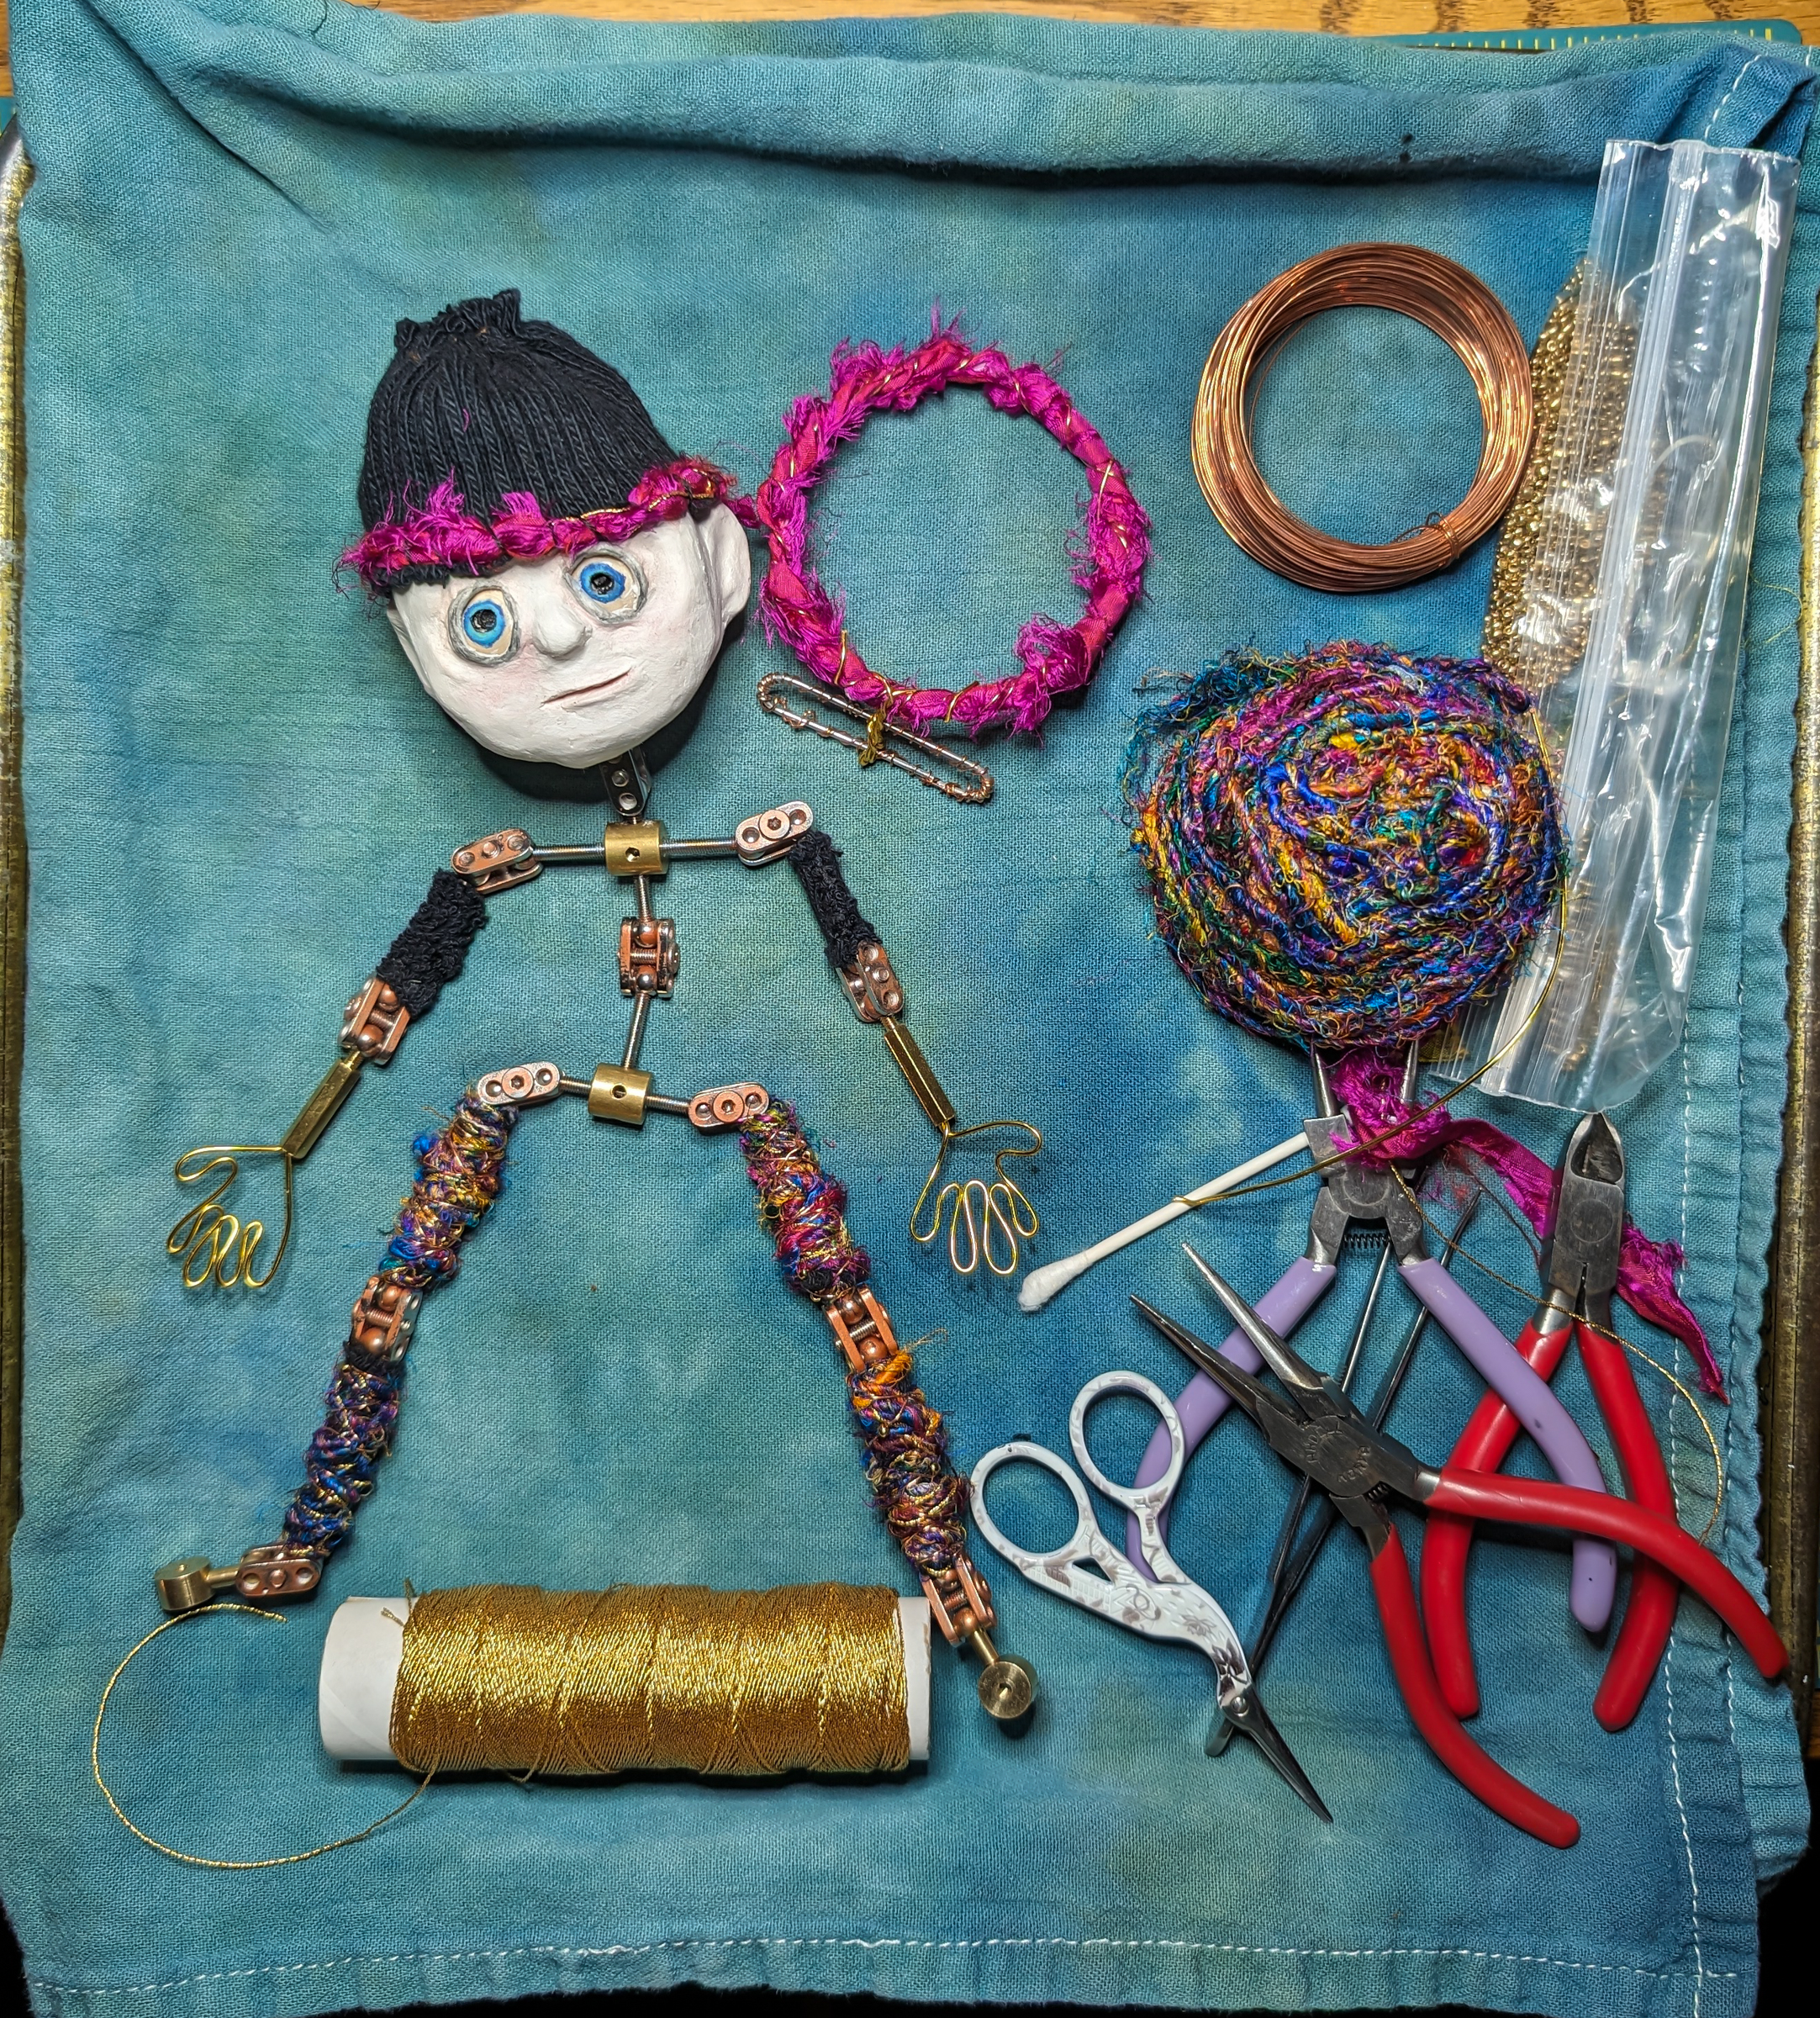
Outfit
Next question: how do I clothe my creature without hiding her cool hardware?
November 30. I got my inspiration from some old Pinterest research on cloth beads. The pictures reminded me of my weakness for boho style and recycled sari silk (which I have a ton of). YouTube videos on wrapping a core with silk, seed beads, and wire are plentiful.
To cover the long bones, I stitched in place bits of an old black sock. I shopped my stash for sari yarn, gold thread, gold beads, and copper wire. And I wrapped away.
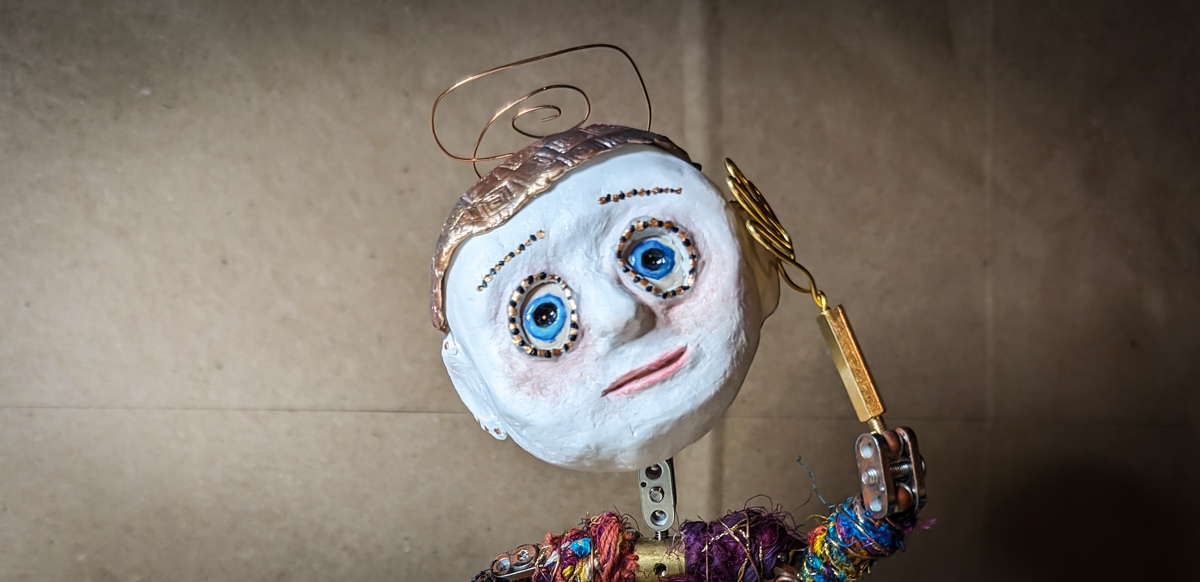
You'll see from the image below that I also made her hands—simple shaped wire.
The wrapped limbs made the bright chrome joints look garish. I wound up dabbing them with clear gesso, then dots of gold and copper acrylic paint, taking care not to seal up the tension screws (which control her posture and sometimes need tightening). Lesson learned: I should have done this before wrapping the bones. It was kind of a spotty mess.
Radio headdress
 A big challenge was what to do with her bald head. I wanted to give her steampunk-looking radio antennae. And should she have hair?? My tendency is to start making my creatures look too realistic instead of simply appreciating the abstraction.
I decided against hair.
Bing's AI Image Creator gave me some wonderful ideas for a helmet (see image), but they were too advanced for my engineering skills. Craft stores probably stock little sets of plastic steampunk gewgaws, but I try to avoid those.
Anyway, after much trial and error, I settled on a simple La Doll stone-clay cap, textured, and painted with copper acrylic. A simple twist of copper wire poking through will have to do for an antenna.
Finished!
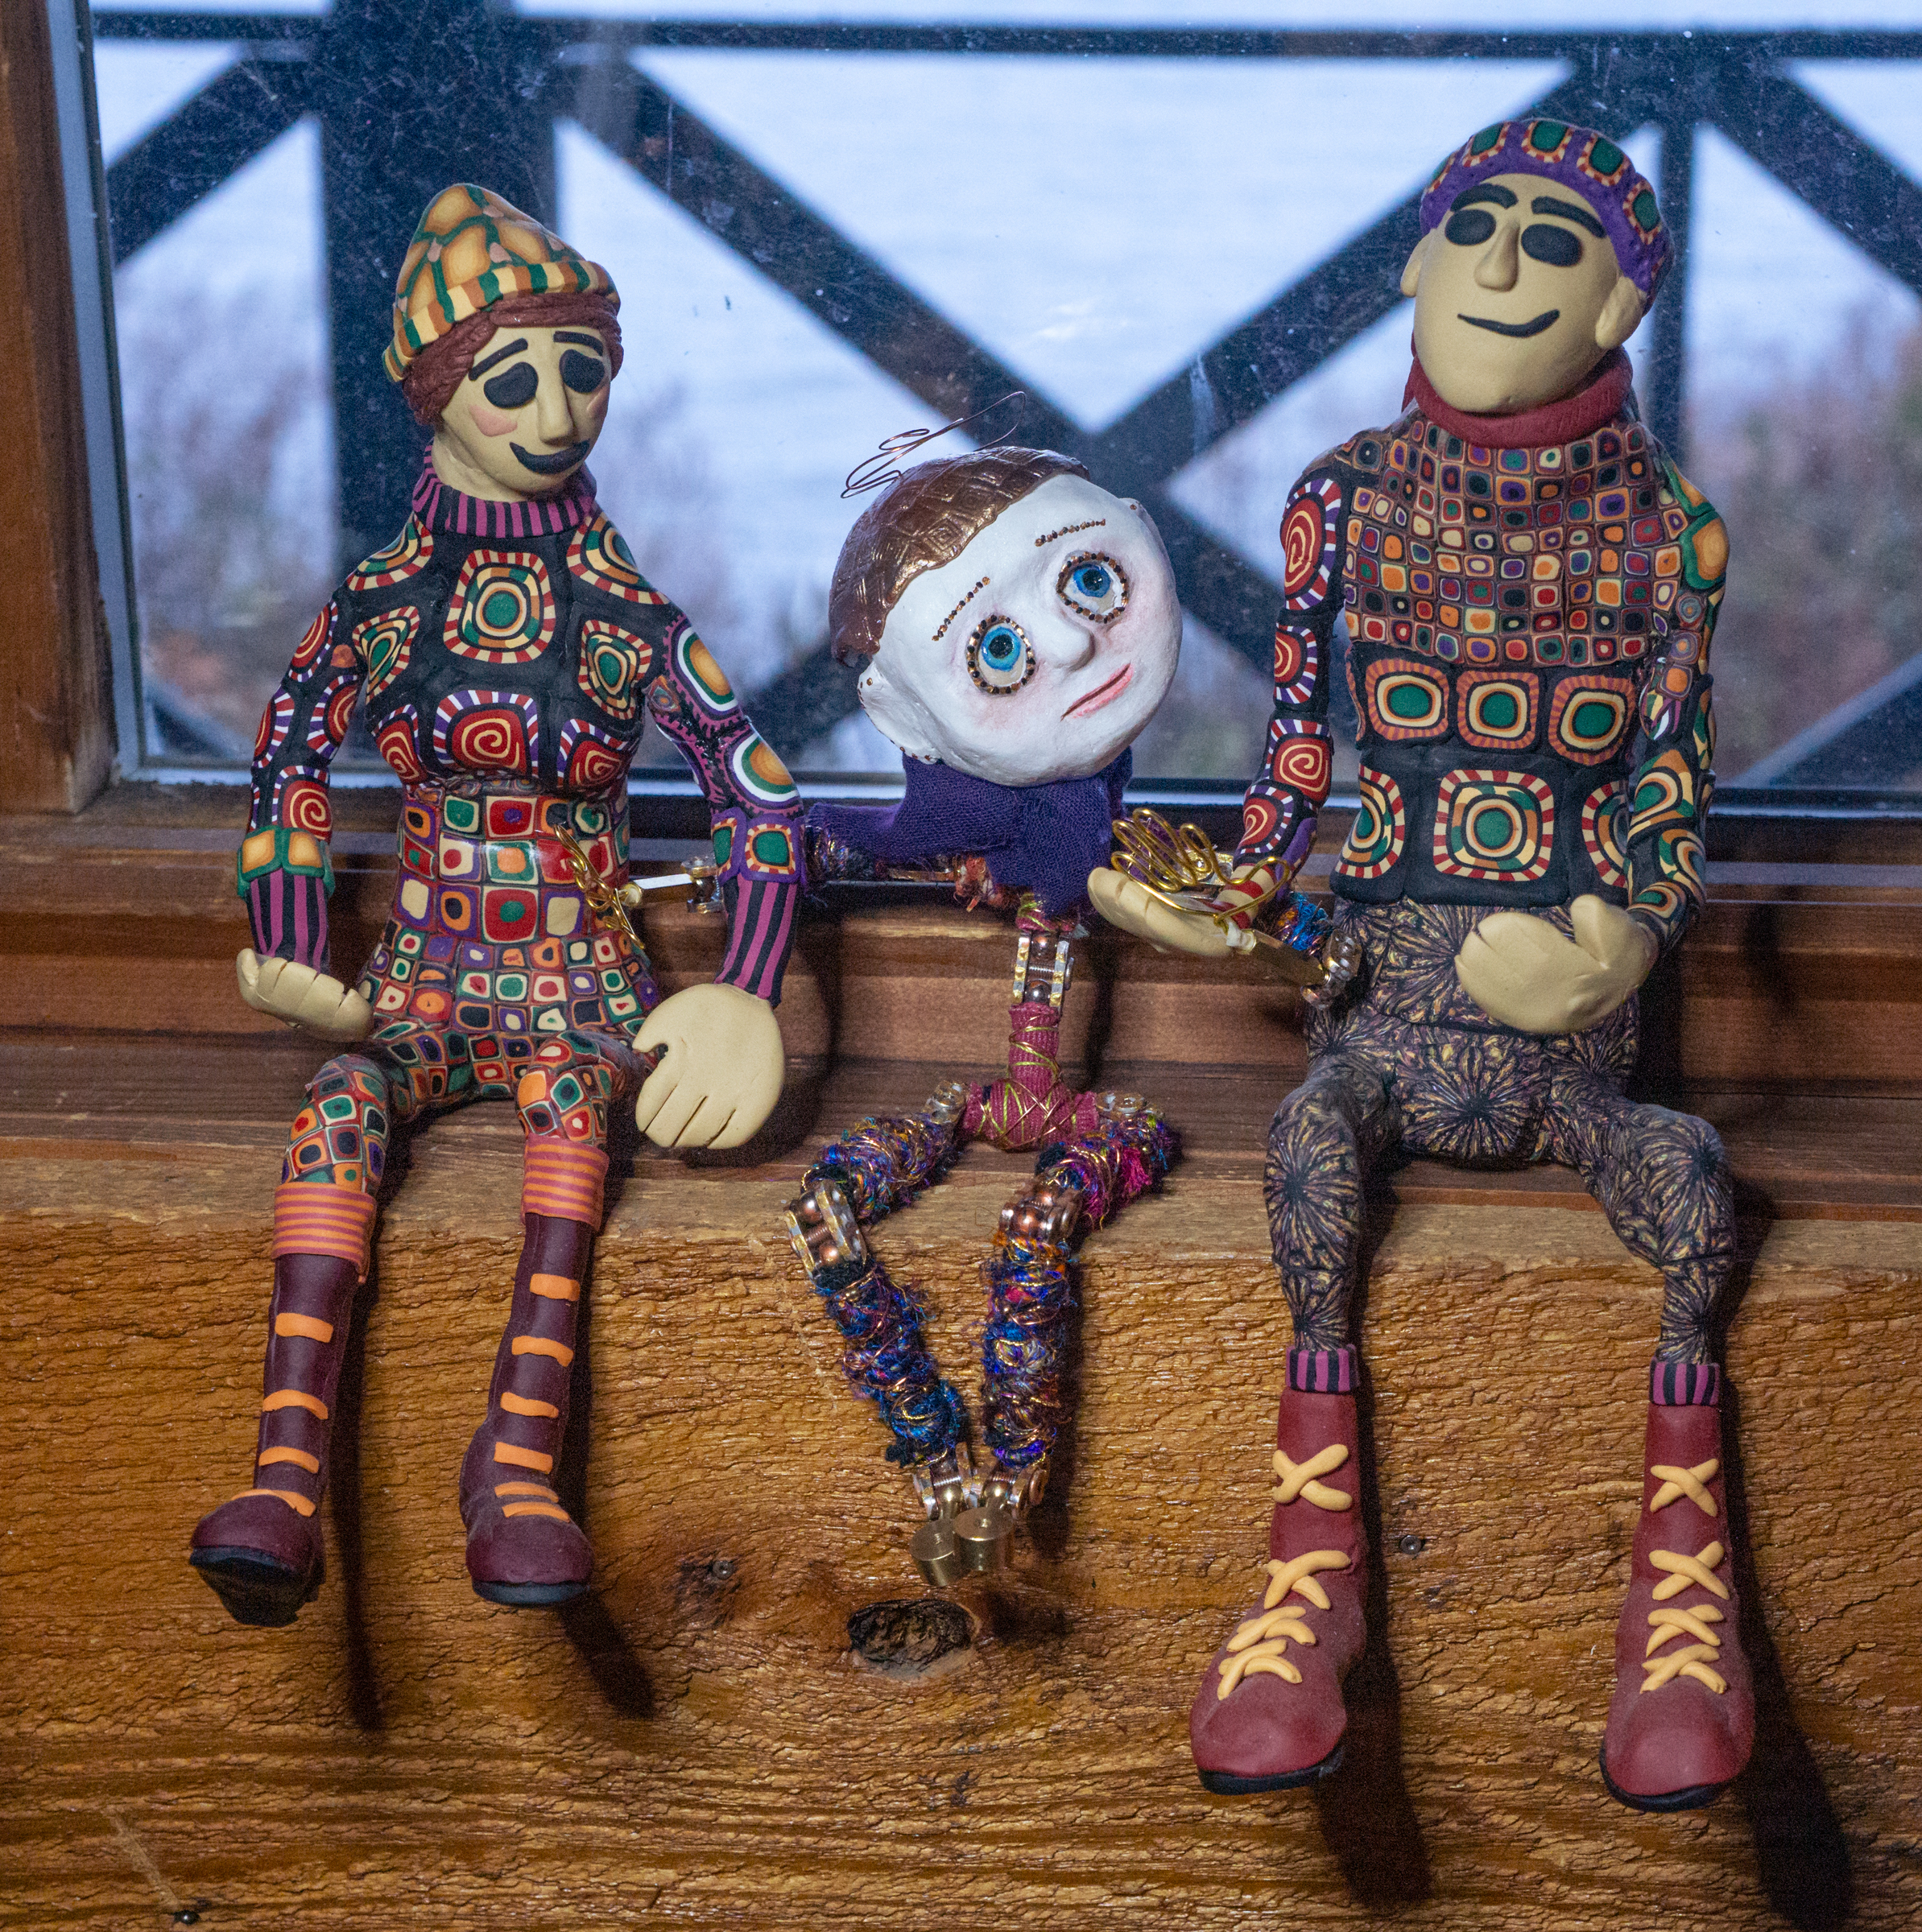
My dolls, my creatures don't usually get their names till they are substantially completed. Since this creature was meant as a companion doll channeling the universe, she received the name Simone, which is Hebrew/Greek for "one who listens." She's a sweetheart.
FOLLOW me on my Facebook page, share this post to your friends, and....
Books from Mad in Pursuit and Susan Barrett Price: KITTY'S PEOPLE: the Irish Family Saga about the Rise of a Generous Woman (2022)| HEADLONG: Over the Edge in Pakistan and China (2018) | THE SUDDEN SILENCE: A Tale of Suspense and Found Treasure (2015) | TRIBE OF THE BREAKAWAY BEADS: Book of Exits and Fresh Starts (2011) | PASSION AND PERIL ON THE SILK ROAD: A Thriller in Pakistan and China (2008). Available at Amazon.